
Easily share your code with the PHP community by contributing your library as a composer package: This article will show you how to publish your code on GitLab and as a package on packagist.org.
Writing Your PHP Code
Publishing open source code has never been easier. Using PHP’s package manager composer, thousands of freely available packages are only one composer require away.
Believe it or not, but there exists an npm package named “is-odd” with over 700,000 weekly downloads. Its sole purpose is to “compute” whether a number is even or odd. For this tutorial, we will replicate this essential functionality as a PHP package.
Start with an empty folder named is-odd and create the following files:
src/IsOdd/IsOdd.class.phptests/IsOddTest.phpcomposer.jsonphpunit.xml.dist
We start by implementing the “IsOdd” functionality in src/IsOdd/IsOdd.class.php:
<?php

namespace IsOdd;

class IsOdd
{
    public static function isOdd(int $number): bool
    {
        return $number % 2 === 1;
    }
}
The function simply returns true for odd numbers and false otherwise.
Next, we implement a simple unit test in tests/IsOddTest.php:
<?php

require_once __DIR__ . '/../vendor/autoload.php';

use IsOdd\IsOdd;

class IsOddTest extends PHPUnit_Framework_TestCase
{
    /**
     * Asserts that the function recognizes oddness properly.
     *
     */
    public function testTruncation()
    {
        $this->assertEquals(true, IsOdd::isOdd(3));
        $this->assertEquals(false, IsOdd::isOdd(12));
    }
}
Creating the composer.json File
The composer.json file is used to describe your library. It lists details about its author, minimal requirements for running it and various other metadata.
We can start with the following content:
{
    "name": "<your username>/is-odd",
    "description": "Computes whether a number is odd.",
    "keywords": [
        "odd", "number", "utility", "even"
    ],
    "type": "library",
    "license": "MIT",
    "homepage": "https://gitlab.com/<your-username>/<your repo name>",
    "authors": [{
        "name": "<your name>",
        "email": "<your email>",
        "homepage": "<your homepage>"
    }],
    "minimum-stability": "dev",
    "require": {
        "php": ">=7.1.0"
    },
    "require-dev": {
        "phpunit/phpunit": "~4.0"
    },
    "support": {
        "issues": "https://gitlab.com/<your-username>/<your repo name>/issues",
        "source": "https://gitlab.com/<your-username>/<your repo name>"
    },
    "autoload": {
        "psr-0": {
            "IsOdd": "src/"
        }
    },
    "autoload-dev": {
        "classmap": ["tests"]
    }
}
A few important things to note:
- Name, description, and keywords are used by packagist to help users find your library, so make sure to choose them wisely
- Publishing using an MIT license is convenient for other developers and makes it more likely that your library becomes popular
- The libraries listed under “require-dev” are only downloaded on non-production systems. In this case, only PhpUnit is included which is needed for running the unit tests.
Testing Your Package
With this configuration in place, simply run:
composer install
Composer will now download your listed dependencies (importantly: PHPUnit). You can then run your test suite with:
php tests/IsOddTest.php
You can expect results similar to:
> php tests/IsOddTest.php
PHPUnit 4.8.36 by Sebastian Bergmann and contributors.

.

Time: 341 ms, Memory: 4.00MB

OK (1 test, 2 assertions)
Publishing On GitLab
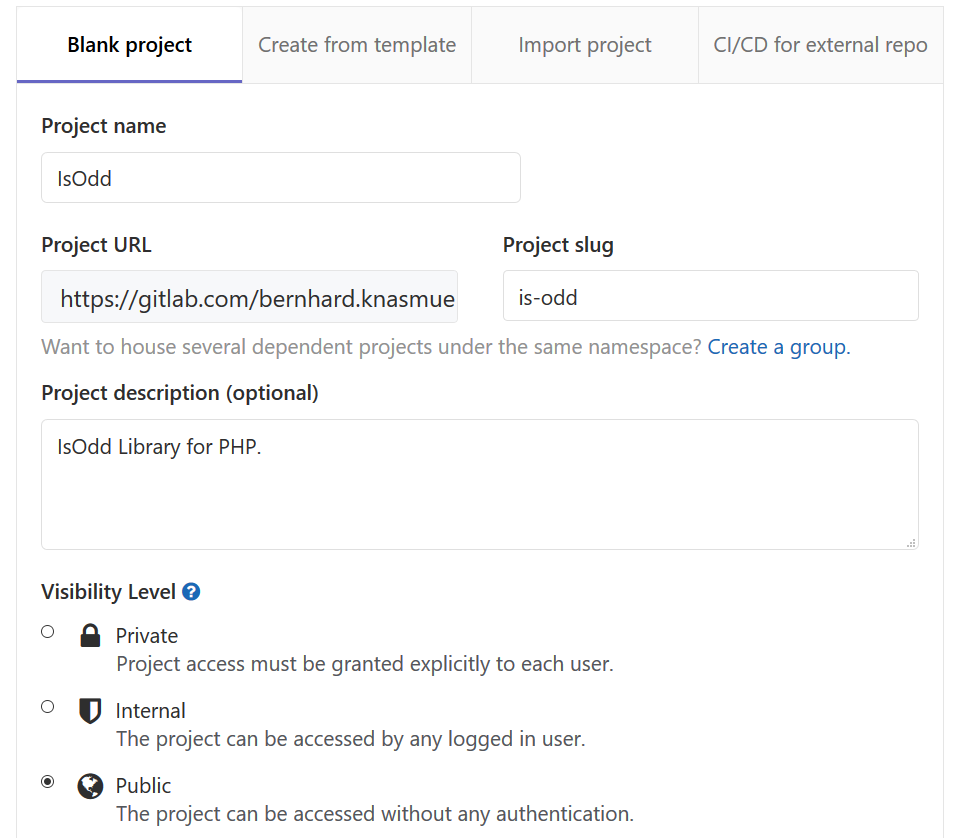
Sign into your GitLab account and select “New Project”. Give it a proper name and description and make sure to set the visibility level to “Public”:
Go back to your main folder and create a .gitignore file with the following content:
/vendor/
Ignoring all files in the vendor directory guarantees that no composer dependencies are included directly into your library (they should instead be downloaded by your library’s users).
Now run the following git commands to create an empty repository, add the created files as a new commit and push this commit to GitLab:
git init
git add .
git commit -m "Init"
git remote add origin [email protected]:<your user>/<your repo>.git
git push origin master
Publishing To Packagist
![]()
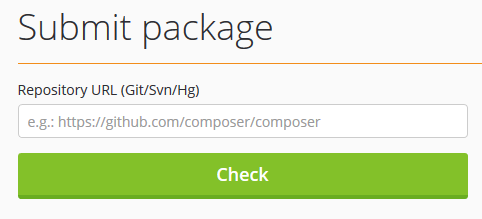
Until now, you have only published your source code, but your library cannot be included by other developers using composer. This is where packagist.org comes in: it allows you to link your public repository to a package that can be required using composer.
Register on packagist.org and select “Submit”. Then enter your GitLab link (e.g.: [email protected]:<your user>/<your project>.git) into the following input field and hit Check:
Packagist will then ask you to confirm your project name.
Updating Your Package
Every time you release a new version of your library on GitLab, you manually need to go packagist and select “Update”. Packagist will then extract the new version of your library from GitLab and new installs will use the updated code afterwards.
To test whether your library can be downloaded, simply create a new folder and run:
composer require <your-user>/is-odd:dev-master
Which should output something like:
./composer.json has been updated
Loading composer repositories with package information
Updating dependencies (including require-dev)
Package operations: 1 install, 0 updates, 0 removals
  - Installing bknasmueller/is-odd (dev-master ddde06e): Cloning ddde06efdf from cache
Writing lock file
Generating autoload files
Where To Go From Here
I showed you how to host your first library on GitLab and make it available via composer. Don’t be too dissappointed if the first version does not make it to 700,000 weekly downloads. Instead, simply enjoy the feeling of giving back to the open source community and continue to improve your programming skills.