
Imagine someone watching all your daily activities from hundreds of meters in the distance. While walls can protect you from spy glasses and interested neighbours looking out of their windows, they are no obstacle for electromagnetic radiation. WiFi networks in particular often build the backbone of our homes’ communication infrastructure: when you come home, your phone connects to your WiFi; when you turn on your video gaming console, it connects to your WiFi; when you leave, the WiFi connection to your phone is removed.
There are ways to measure such WiFi activities which require nothing but some cheap pieces of hardware, the right software tools and a little bit of network knowledge. In this post series, I want to investigate this topic, present state of the art tools and ways to set them up and give advice on what can be done to protect against the described invasions of your privacy.
Part 1 explains how to install Kismet – the swiss army knife for network monitoring.
Kismet – An Open Source WiFi Scanner
Kismet 2019-04 is the first full release in several years and comes with a completely new user interface.
To install this release candidate, we start from a freshly installed Ubuntu 19.04 virtual machine.
Build from source
First, update your repository and install a few dependencies:
sudo -s
apt-get update
apt-get upgrade -y
apt-get install -y git build-essential libmicrohttpd-dev pkg-config zlib1g-dev libnl-3-dev \
python-protobuf python-requests librtlsdr0 python-usb python-paho-mqtt libusb-1.0-0-dev \
libsqlite3-dev protobuf-compiler protobuf-c-compiler libsensors4-dev python python-setuptools \
libnl-genl-3-dev libcap-dev libpcap-dev libnm-dev libdw-dev libprotobuf-dev libprotobuf-c-dev net-tools
Clone the newest version of Kismet from github:
git clone --recursive https://www.kismetwireless.net/git/kismet.git
cd kismet
And start the compilation process:
./configure
make
make suidinstall
usermod -aG kismet <your linux user>
Make sure to replace <your linux user> with the user account you want to use Kismet with.
Run Kismet 2019-04
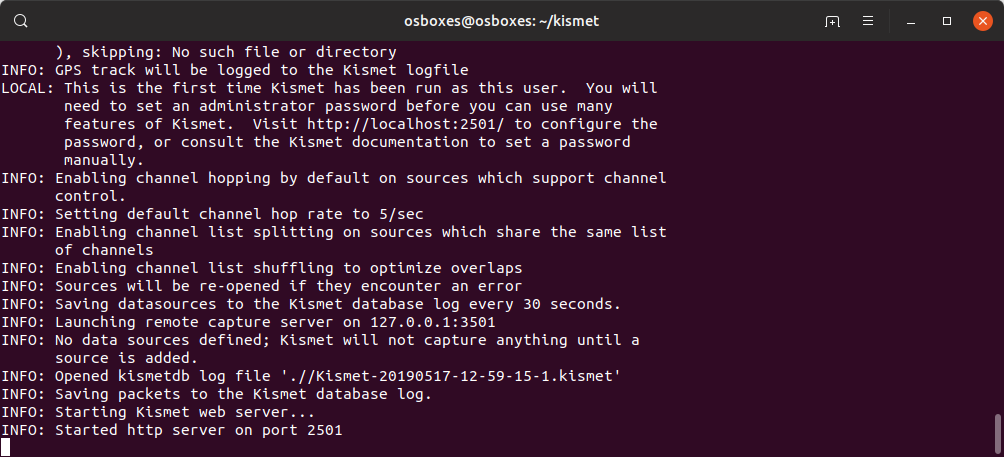
Finally, run the kismet server:
kismet
You should see an output similar to this:
 Follow the instructions and visit http://localhost:2501/ in your web browser to be welcome by the following screen:
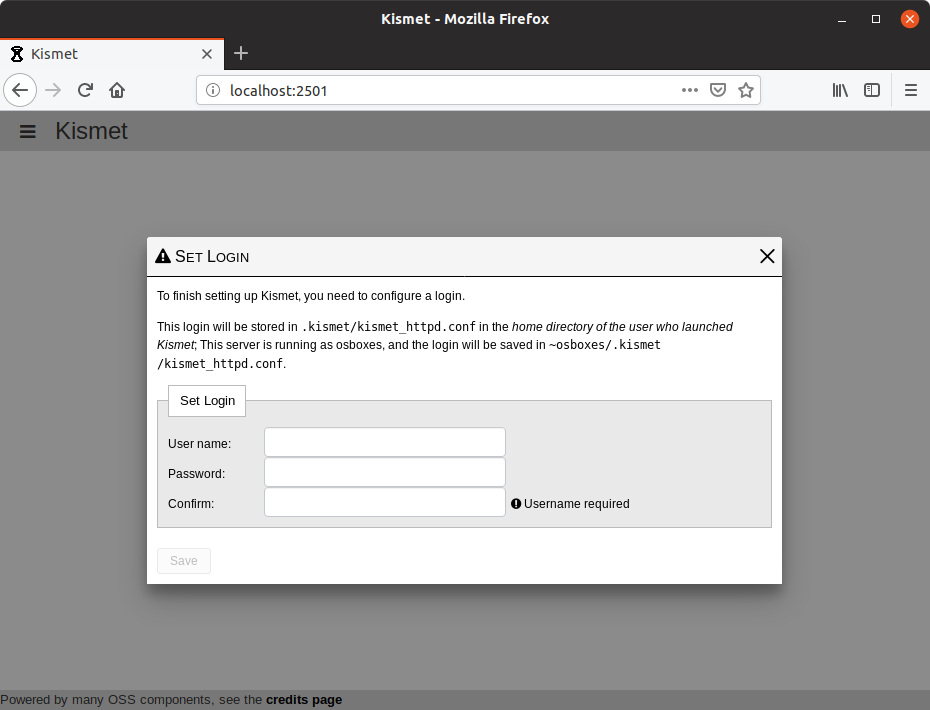
Set your user name and password to finish the setup.
Next Steps
You have built and installed Kismet and are now ready to use it. Stay tuned for the next post in this series where I will explain how to use Kismet for monitoring your WiFi infrastructure.