
In this article, I’ll show how to set up a simple development environment for working with Spring Boot inside a VirtualBox Ubuntu Server. You will learn how to
- configure port forwarding for interacting with the development server
- set up shared folders for using an IDE on your client to edit code on the server
- build and execute the application using maven
Let’s get started!
Prerequisites
You need:
- VirtualBox installed on your host (i.e., your desktop or laptop)
- A virtual machine with your favorite Linux server already installed (for this article, I will use Ubuntu Server 18.04 from https://www.osboxes.org/ubuntu-server/)
- Your favorite IDE (e.g., IntelliJ or Eclipse) or text editor (e.g., Atom or VSCode) already installed
- A Spring Boot project (e.g., this one: https://spring.io/guides/gs/serving-web-content/)
Set up VirtualBox
Create a new virtual machine with enough memory and use the downloaded VDI file from osboxes as the hard drive.
Before you start the VM, click “Settings” and “Network” and make sure that the Adapter 1 is in “NAT” mode.
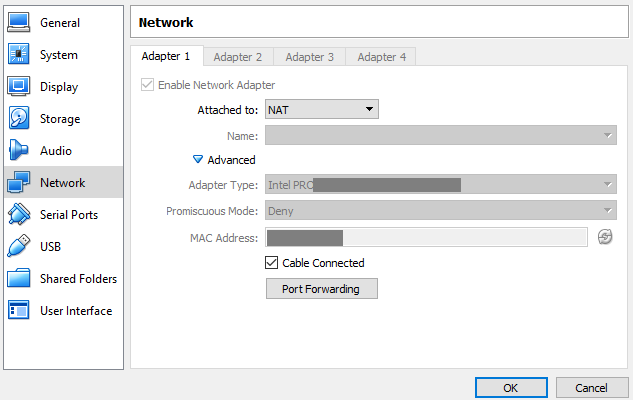
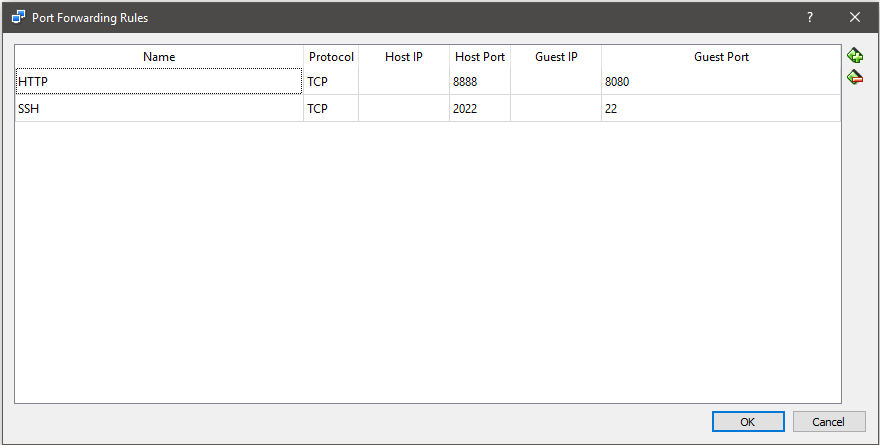
Then, click on “Port Forwarding” and enter the following two entries for SSH and HTTP forwarding:
Finally, we need to set up a shared folder. Enter the “Shared Folders” tab in settings and click the “add shared folder” button on the right hand side.
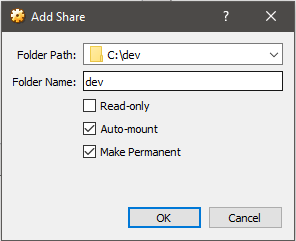
Above, I mount “C:\dev” which contains the Java Project in a subdirectory as “dev” into the virtual machine. Make sure to select “auto-mount” and “make permanent”.
Next, start the VM and wait until it has fully booted. The machine should greet you with the following login screen:

Use the default credentials from osboxes (user: osboxes; pw: osboxes.org) to login and remember to change the password afterwards.
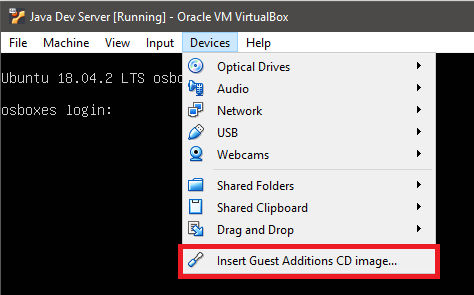
To set up the shared folder, we first need to install the VBoxAddons. Under “Devices”, select “Insert Guest Additions CD image…” and mount the drive with the following command:
sudo mkdir -p /media/cdrom
sudo mount /dev/cdrom /media/cdrom
sudo apt-get install -y gcc make
sudo /media/cdrom/VBoxLinuxAdditions.run
sudo usermod -aG vboxsf osboxes
Remember to replace “osboxes” with your server username in case you use a different virtual machine image.
After a reboot, the shared folder should be available at /media/sf_<foldername>.
Next, install an openSSH server (since using the VirtualBox GUI is not very handy):
sudo apt-get update; sudo apt-get install -y openssh-server
Once the SSH server is up and running, you can minimize the VirtualBox GUI and connect via Putty to [email protected] on port 2022 (the previously set up NAT forwarding maps the 2022 port on the host to the 22 port on the guest).
Set up Java
We will install the JDK directly from Ubuntu (if you need a newer version, there are countless tutorials):
sudo apt-get install -y default-jdk
Also, we need maven for building our Java project:
sudo apt-get install -y maven
Confirm that everything works by running
mvn -version
Running Spring Boot
In order to build and run your project, change directory to the shared folder and into the subdirectory containing your pom.xml. There, you can run the following command to build and run:
mvn spring-boot:run
Maven will fetch all the necessary dependencies which can take a few minutes on the first run.
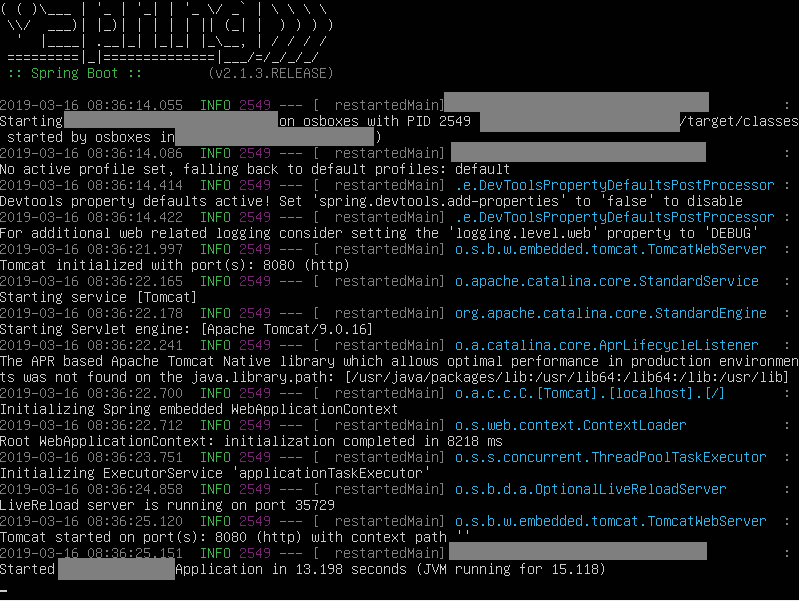
Once your application is ready, you should see something like this:
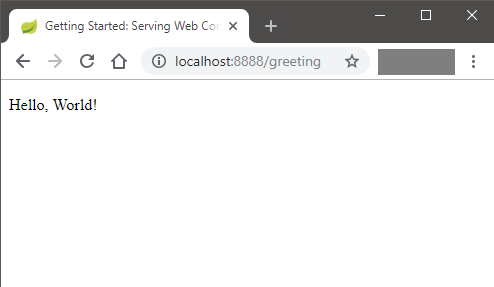
Due to the previously set up port forwarding, we can now reach the Spring Boot application on our virtual box host simply by browsing “http://localhost:8888”:
Using this setup
Since the code is only mounted inside the VM, you can conveniently change it on your host using your favorite IDE. You do not need to synchronize changes manually (e.g. by uploading files to an FTP or something like that).
Having all tools and dependencies you need for your specific project in one place is crucial when you deal with multiple projects simultaneously, each one requiring a different Java version for example.
Another advantage of this solution is that you can easily copy and share the VM with you collaborators, guaranteeing that everyone on your team works in the same environment.
If you want to take this one step further, you should really have a look at Vagrant, a product which automates many of the steps described here. However, this solution is very simple and can be set up in less than 30 minutes while still being very flexible.